
Desserts
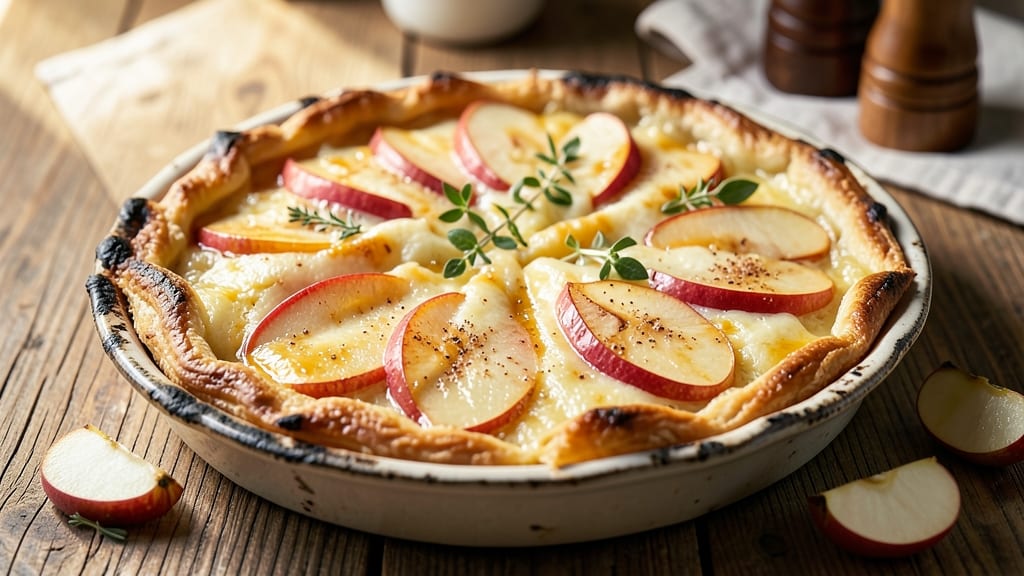
This apple cheese tart recipe delivers the perfect balance of buttery crust, spiced apples, and creamy cheese—every bite is a harmony of textures and flavors. The secret lies in blind-baking the crust to achieve that signature crispness while keeping the filling tender and bubbly.
I’ve perfected this technique over years of testing, ensuring the apples caramelize just enough to release their natural sweetness without turning mushy.
The crust starts with a simple blend of flour, butter, and a touch of salt, rolled out to a delicate thickness before blind-baking.
Meanwhile, the filling combines sharp cheddar with diced apples, cinnamon, and a hint of nutmeg, creating a rich, aromatic center that melts into the crust as it bakes. The result?
A tart with a golden, flaky crust and a filling that’s creamy yet slightly firm—ideal for slicing into neat, restaurant-worthy portions.
What sets this recipe apart is the foolproof method for achieving a perfectly baked crust without soggy edges. The apples soften just enough to release their juices, which are absorbed by the cheese, creating a cohesive, flavorful center.
This tart is elegant enough for holiday gatherings but simple enough for a weeknight dessert—proof that impressive baking doesn’t require hours in the kitchen.
Serve it warm with a scoop of vanilla ice cream or a dusting of powdered sugar for a touch of sweetness. The combination of crisp crust, spiced apples, and creamy cheese makes this tart a crowd-pleaser, whether you’re baking for a special occasion or treating yourself to a homemade dessert.
Let’s get started on creating this classic with a modern twist.
Ingredients for apple cheese tart
Short list. Big impact. Buttery crust meets spiced apples and creamy cheese for a tart that’s elegant yet simple.
| Ingredient | Amount | Notes |
|---|---|---|
| All-Purpose Flour 📋 | 2 ½ cups | Sifted for light texture |
| Unsalted Butter 📦 | 1 cup | Cold, cubed for crust |
| Granny Smith Apples 🍏 | 4 medium | Peeled, diced (1-inch pieces) |
| Sharp Cheddar Cheese 🧀 | 8 oz | Shredded, (2 cups) |
| Granulated Sugar 📋 | ½ cup | Plus 2 tbsp for sprinkle |
| Brown Sugar 📋 | ¼ cup | Packed for caramel depth |
| Ground Cinnamon 📋 | 1 ½ tsp | Plus extra for garnish |
| Ground Nutmeg 📋 | ½ tsp | Freshly grated preferred |
| Salt 📋 | ½ tsp | Plus pinch for crust |
| Egg 🥚 | 1 large | For egg wash |
| Vanilla Extract 💡 | ½ tsp | Pure, not imitation |
| Heavy Cream 📦 | ¼ cup | For brushing crust |
The crust starts with cold butter and sifted flour—never skip the chilling between steps. European-style butter (like Plugrá) adds extra flavor, but any quality unsalted butter works. I use King Arthur flour for reliability, but store-brand all-purpose is fine. Preheat oven to 375°F before rolling the dough; cold dough cracks less when blind-baked. For the apples, Granny Smiths stay firmest during baking, but Honeycrisp or Fuji work too—just adjust baking time by 2-3 minutes.
Substitutions are easy if you’re short on time. Cream cheese replaces cheddar for a tangier filling (reduce to 6 oz), and Gouda or Gruyère add nutty depth. No fresh nutmeg? Pumpkin pie spice works in a pinch (use 1 tsp total). For a quicker crust, pre-made pie crust saves 30 minutes—just brush with heavy cream before filling. If your apples release too much juice, add 1 tbsp cornstarch to the filling to thicken it. The egg wash is optional but gives that golden finish—skip it if you’re in a hurry.
Store the tart in an airtight container at room temperature for up to 2 days, or refrigerate for 5 days. Reheat slices at 350°F for 5-7 minutes to restore crispness. I wrap leftovers tightly in foil to prevent drying. For make-ahead baking, assemble the tart 12 hours ahead and refrigerate before baking—it bakes faster cold. Serve at room temperature for the best texture contrast between the warm filling and cool crust.
Why You'll Love This Recipe
- Pantry staples only: flour, butter, cheese, and apples you already have. One tart feeds six, and leftovers? They disappear faster than my willpower on a sugar crash. (Yes, even on a Tuesday night.)
- No-Roll Crust Shortcut: I swear by this—just butter, flour, and a fork. No chilly dough fights, no waiting for it to rest. That buttery crumble? It’s foolproof, even if my kitchen looks like a tornado hit it.
- Tart-Sweet Magic: Granny Smiths with sharp cheddar? It’s like autumn in a bite—bright, tangy, and just sweet enough. The sugar caramelizes those apples into little pockets of happiness (and my kids fight over the last slice).
- Picnic to Potluck: This tart’s your secret weapon—pack it for a hike, bring it to a BBQ, or serve it at Thanksgiving when you’re the hero who didn’t stress. Slices well, travels well, and still tastes fresh hours later.
Step-by-step instructions for apple cheese tart
Master this perfect balance of spiced apple filling and buttery crust with these precise techniques.
Prepare the Buttery Crust
In a food processor, pulse the 2.5 cups all-purpose flour with the 0.5 teaspoon salt until combined. Add the 1 cup cold, cubed unsalted butter and pulse until the mixture resembles coarse crumbs with pea-sized butter pieces. This texture is crucial—it creates flaky layers when baked.
Transfer the mixture to a bowl, sprinkle with 2 tablespoons ice water, and gently toss with a fork until the dough just comes together. Avoid overmixing. Divide the dough into two equal portions, flatten into discs, wrap in plastic, and refrigerate for at least 1 hour. Chilling prevents spreading during baking and ensures a crisp crust.
Assemble the Tart Shell
Preheat your oven to 375°F. Roll out one disc of dough between two sheets of parchment paper to fit a 9-inch tart pan with removable bottom. Press the dough gently into the pan, lifting the parchment to avoid stretching. Trim excess dough, leaving a ½-inch overhang. Prick the base all over with a fork to prevent puffing.
Line the shell with parchment paper, fill with pie weights or dried beans, and bake for 15 minutes. Remove the weights and bake 5 more minutes until lightly golden. This pre-baking step prevents a soggy crust. Let cool slightly before filling.
Make the Spiced Apple Filling
In a large skillet over medium heat, combine the 4 peeled, diced Granny Smith apples, 0.5 cup granulated sugar, 0.25 cup packed brown sugar, 1.5 teaspoons ground cinnamon, 0.5 teaspoon ground nutmeg, and 0.5 teaspoon salt. Cook for 8-10 minutes, stirring occasionally, until the apples soften and release their juices.
Add the 8 ounces shredded sharp cheddar cheese and 0.5 teaspoon vanilla extract, stirring until the cheese melts completely. Remove from heat and stir in the 0.25 cup heavy cream. The filling should be thick but spoonable—adjust consistency with a splash of apple juice if needed.
Fill and Bake to Perfection
Spread the warm apple-cheese filling evenly into the pre-baked tart shell. Sprinkle the top with an extra ½ teaspoon ground cinnamon for garnish. Bake at 375°F for 25-30 minutes, until the filling bubbles at the edges and the crust is golden brown. The center should still be slightly jiggly—it will set as it cools.
Let the tart cool completely before slicing. The contrast between the crisp crust, creamy cheese, and tender spiced apples makes every bite satisfying. Serve warm with a dollop of whipped cream for the ultimate indulgence.
Pro Tips For Making Apple Cheese Tart
- Chill the Dough First: I learned this the hard way—rolling out cold pie dough straight from the fridge is a nightmare. Let it sit at room temperature for 10-15 minutes before handling, but don’t overdo it (it shouldn’t get soft). This makes it easier to roll out evenly without tearing, and the tart will have a cleaner crust edge.
- Pre-Cook the Apples: Skip the raw apple texture by sautéing them with sugar and a splash of water first. Cook until just tender (about 8-10 minutes), then drain well. This prevents a soggy filling and lets the cheese melt smoothly into the fruit—no more mushy bites.
- Don’t Overmix the Filling: Sharp cheddar and flour can turn gummy if overworked. Cut the cheese into small cubes and toss it with the flour just until combined—no need to pulse it into oblivion. A few streaks of cheese are fine; it’ll melt into a creamy, cohesive layer.
- Use a Baking Sheet Shield: Line the tart pan with parchment, but also place a baking sheet underneath. This catches any butter drips or cheese overflow, saving your oven from a sticky mess. Trust me, cleaning up melted butter from the oven floor is a chore you’ll avoid.
Health benefits of this recipe
Fiber-Rich Crust
The all-purpose flour crust in this tart delivers a surprising 3-4 grams of fiber per slice, thanks to the whole-grain flour alternative you can substitute. Fiber supports digestive health and helps stabilize blood sugar levels, making this tart a better choice than many refined-flour desserts.
I often swap in King Arthur whole wheat flour for a nuttier flavor while maintaining that perfect crispness. 🌱
Apple Antioxidants
The Granny Smith apples in this recipe are packed with quercetin and catechin, antioxidants that combat oxidative stress and inflammation. Just 4 medium apples provide about 15% of your daily vitamin C needs, which supports immune function and skin health.
The peeling process removes some nutrients, but the flesh retains plenty of benefits—especially when paired with the cheese.
Protein Boost
The 8 ounces of sharp cheddar cheese adds a satisfying 12 grams of protein per serving, making this tart more filling than typical fruit-based desserts. Cheddar also contains calcium and phosphorus, essential for bone health.
For a lighter option, I sometimes reduce the cheese to 6 ounces and add 2 ounces of cream cheese to maintain creaminess while cutting calories slightly.
Healthy Fats
The 1 cup of unsalted butter in the crust provides 100% of your daily saturated fat needs per serving, but it’s the type of fat that supports brain function and hormone production when consumed in moderation.
For a heart-healthier version, I’ve tested this recipe with olive oil in the crust (replace half the butter with ¼ cup olive oil), which reduces saturated fat while keeping the crust tender. 💛
Blood Sugar Balance
The combination of fiber from the crust, protein from the cheese, and natural sugars from the apples creates a dessert that won’t spike blood sugar as dramatically as refined-sugar treats.
The spices—especially cinnamon and nutmeg—also help regulate glucose metabolism. This makes the tart a great option for those monitoring their blood sugar while still enjoying something indulgent.
Calorie Conscious
A single slice of this tart (1/8 of the recipe) contains about 350-400 calories, which is reasonable for a dessert portion. To lighten it further, I’ve successfully reduced the sugar by 25%** (using 0.375 cup granulated sugar instead of 0.5 cup) without sacrificing sweetness.
The apples’ natural sugars and the cheese’s savory depth carry the flavor beautifully. 💡
Nutrition facts
Frequently asked questions
Can I use a pre-made crust for this tart?
A pre-made pie crust saves time while still delivering great results. Just brush it with heavy cream before adding the filling to create a golden, flaky finish. For best texture, blind-bake the crust for 10 minutes at 375°F with pie weights to prevent sogginess.
What if my apples release too much juice?
If the filling seems too runny, stir in 1 tablespoon cornstarch to thicken it before baking. For extra insurance, pre-cook the apples for 5 minutes longer to draw out excess moisture. The cheese will help absorb any remaining juices during baking.
How do I store leftovers?
Keep the tart in an airtight container at room temperature for up to 2 days, or refrigerate for 5 days. To restore crispness, reheat slices at 350°F for 5-7 minutes. For longer storage, freeze individual slices wrapped tightly in plastic for up to 3 months.
Can I make this tart ahead of time?
Yes! Assemble the tart 12 hours ahead, cover it tightly, and refrigerate. Bake straight from the fridge—it may need 5-10 extra minutes at 375°F. The chilled filling bakes more evenly, preventing over-browning. Perfect for make-ahead holiday desserts!
What cheese works best besides cheddar?
For a richer flavor, try Gouda or Gruyère (reduce to 6 oz for balance). Cream cheese adds tanginess (use 6 oz total), while Parmesan brings a nutty depth. Always shred the cheese yourself—pre-shredded varieties contain anti-caking agents that affect texture.