
Appetizers
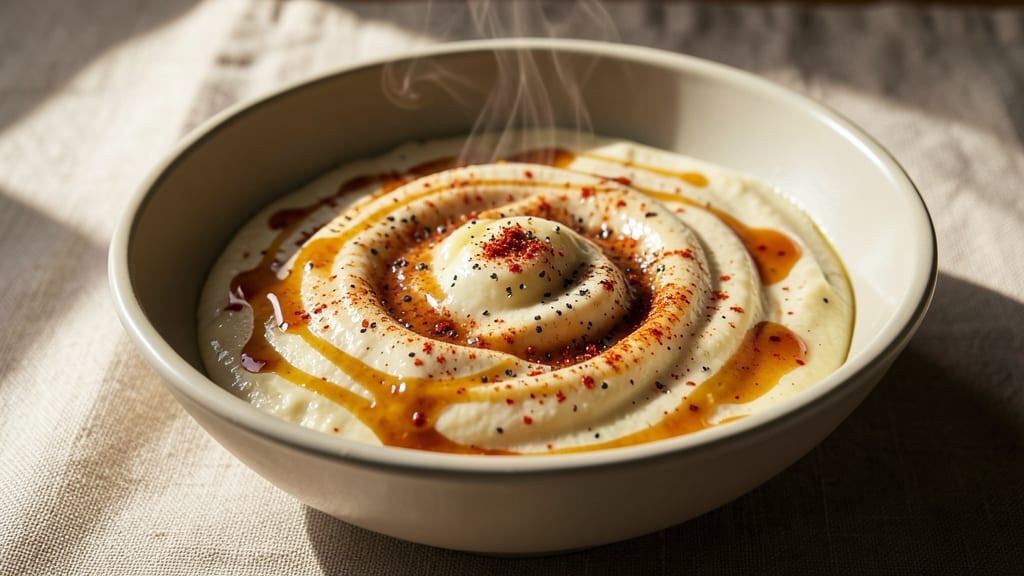
This bar cheese dip recipe transforms simple ingredients into a warm, bubbly crowd-pleaser that disappears faster than you can say "super bowl." The secret lies in the perfect cheese blend—creamy, stretchy, and just hot enough to make every bite irresistible.
With only 15 minutes of active time, you'll have a party-worthy dip that pairs perfectly with tortilla chips or fresh veggies.
The magic happens on the stovetop, where sharp cheddar and mild Monterey Jack melt into a velvety, golden sauce. A splash of milk keeps it creamy without curdling, while a pinch of cayenne adds just enough heat to keep things interesting.
The dip should be smooth, bubbly, and ready to serve—no grainy textures or sad, separated cheese here.
What you'll end up with is a restaurant-quality dip that's rich, tangy, and just spicy enough to satisfy even the pickiest eaters. The aroma alone will have guests lining up, and the first bite delivers that perfect balance of cheesy goodness and subtle kick.
This isn't just an appetizer—it's the star of the show.
For extra flair, top with crispy bacon bits, diced jalapeños, or fresh green onions. Serve in a cast-iron skillet for that classic pub vibe, and watch as the dip becomes the centerpiece of your gathering. Let's get started!
Ingredients for bar cheese dip
Simple pantry staples transform into a bubbly, restaurant-worthy bar cheese dip everyone will love.
| Ingredient | Amount | Notes |
|---|---|---|
| Sharp Cheddar Cheese 🧀 | 1 ½ cups | Block cheese, freshly grated |
| Monterey Jack Cheese 🧀 | 1 cup | Mild flavor, freshly grated |
| Whole Milk 🥛 | ¼ cup | For creaminess, not low-fat |
| Cayenne Pepper 🌶️ | ¼ tsp | Adjust for heat preference |
| Garlic Powder 🧄 | 1 tsp | Freshly ground preferred |
| Salt 🧂 | ½ tsp | Kosher or sea salt |
| Butter 🧈 | 2 tbsp | Unsalted for flavor control |
| Tortilla Chips 🍟 | 4 cups | For serving, thick-cut preferred |
| Crispy Bacon Bits 🥓 | ¼ cup | Optional garnish, store-bought OK |
| Fresh Green Onions 🧅 | 2 whole | Sliced, for garnish |
| Diced Jalapeños 🌶️ | ¼ cup | Pickled or fresh, optional |
| Heavy Cream 🥛 | ⅛ cup | For extra richness (optional) |
The cheeses are the stars here—sharp cheddar gives that tangy kick while Monterey Jack keeps it smooth. Grab a block of each and grate it yourself (pre-grated gets clumpy, trust me). Whole Foods or Kroger usually have good options, but any grocery store works. For extra flavor, look for cheddar with a little orange hue—it's sharper. The milk? Whole milk only—low-fat or skim will make the dip separate. And if you're feeling fancy, add a splash of heavy cream for that ultra-creamy texture (though it's not required).
No sharp cheddar? Pepper jack or white cheddar work in a pinch, but the flavor won't be quite the same. Running low on Monterey Jack? Colby Jack or mild cheddar are decent swaps. The cayenne is key for that subtle heat—skip it if you're serving kids, but add a pinch more if you love spice. Fresh garlic powder makes a difference, but regular works fine. For the garnishes, bacon bits from the deli section are crispier than store-bought bags, and Trader Joe's has the best pre-sliced green onions. Jalapeños? Pickled ones add tang, fresh ones bring heat—both are great.
This dip reheats beautifully—just pop it in a skillet over low heat for a minute or two. Keeps 3-4 days in the fridge, but honestly, it won't last that long. For parties, double the recipe and store in a slow cooker on warm—it stays creamy all day. Garnishes like bacon and green onions can be added fresh when serving, so don't worry about prepping them too early. And if you're feeling extra, serve it in a cast-iron skillet straight from the oven for that pub-style presentation.
Why You'll Love This Recipe
- Five-Ingredient Magic: I swear, this dip is the kind of recipe where you look at the ingredients list and think, "How can this be good?"—then taste it and realize you’ve been missing out. Sharp cheddar and Monterey Jack melt into this velvety, slightly spicy dream with just milk, a pinch of cayenne, and garlic powder. No fancy techniques, no waiting for hours—just good stuff.
- Crowd-Pleaser Every Time: Between us, this is the dip that gets eaten first at parties. Kids love it (the mild Monterey Jack keeps them happy), adults go back for seconds (thanks to that cheddar kick), and even my picky uncle—who claims he "doesn’t like spicy"—dips his chips twice. It’s the kind of dish where no one feels left out.
- Leftovers? More Like Leftovers: Honestly, I’ve never had this dip last more than a day in my house. But the beauty? It reheats like a champ—just pop it in the microwave for 30 seconds, and it’s smoother than before. I keep a small batch in the fridge for lazy nights or last-minute game-day snacks. (Yes, even on a Tuesday night.)
- Budget-Friendly Flex: This recipe costs me about $3 for a big batch—cheaper than takeout, way better than store-bought. The cheddar and Monterey Jack stretch far, the milk is the only liquid you need, and that cayenne? A tiny pinch goes a long way. It’s the kind of dish that makes me feel like I’m feeding people fancy food without breaking the bank.
Step-by-step instructions for warm, bubbly bar cheese dip
Here's how to make this creamy, flavorful cheese dip that's perfect for parties and game days.
Melt the Cheese and Butter
In a medium saucepan, combine the 1.5 cups Sharp Cheddar Cheese, 1 cup Monterey Jack Cheese, 2 tbsp Butter, 0.25 cup Whole Milk, 0.125 cup Heavy Cream, 1 tsp Garlic Powder, 0.5 tsp Salt, and 0.25 tsp Cayenne Pepper. I like to use a saucepan with sloped sides so the cheese melts evenly without spilling over.
Place the saucepan over medium-low heat and stir constantly with a wooden spoon. You'll see the cheese start to break down into small clumps first, then gradually become smooth and creamy. This process takes about 5-7 minutes—don't rush it. The dip should be fully melted and bubbling gently, with a velvety texture that coats the back of your spoon.
Cook Until Smooth and Bubbly
Continue stirring for another 2-3 minutes until the mixture reaches a thick, creamy consistency. You're aiming for a dip that's smooth enough to coat a chip thoroughly but still holds its shape when dipped. If it starts to look too thick, add 1 tablespoon of milk or cream at a time until it reaches your desired consistency.
Here's the thing—if you see any lumps forming, don't panic. Just keep stirring and scraping the bottom of the pan. The heat will eventually break down any remaining clumps. The dip is ready when it's completely smooth and bubbling steadily, which means it's ready to serve and enjoy.
Prepare the Toppings
While the cheese dip is melting, slice the 2 whole Fresh Green Onions into thin rings and set them aside. If using, drain the 0.25 cup Diced Jalapeños (if pickled) and pat them dry with a paper towel. The crispy bacon bits don't need any prep—they're ready to add right away.
Arrange the 4 cups Tortilla Chips on a large serving platter or in a shallow bowl. I like to spread them out so they're easy to grab and dip. This is where you can get creative—some people like to layer the chips, while others prefer a single layer for easy access.
Assemble and Serve
Once the cheese dip is fully melted and smooth, transfer it to a serving bowl. I prefer a deep, heatproof bowl so the dip stays warm longer. Sprinkle the crispy bacon bits and diced jalapeños evenly over the top, then garnish with the sliced green onions. This not only looks beautiful but adds extra layers of flavor with each bite.
Serve the dip immediately with the prepared tortilla chips. The contrast of the warm, creamy cheese with the crispy chips is what makes this dip so irresistible. If you're serving it at a gathering, you might want to place the bowl in a warm oven (200°F) to keep it bubbly and warm for longer.
Pro Tips For Making Bar Cheese Dip
- STIR CONSTANTLY AT FIRST: The first 2 minutes of melting are the most critical—if you walk away, the milk will seize up and turn grainy. I learned this the hard way after scraping a clumpy mess off my skillet. Keep that spoon moving until the cheeses are fully incorporated, then ease up.
- GRATE THE CHEESE FINE: Skip the big chunks—Monterey Jack and sharp cheddar melt unevenly if they’re too large. A box grater or food processor does the job faster than a knife, and the dip will be silky, not lumpy. (Yes, even if you’re impatient like me.)
- USE WHOLE MILK, NOT HEAVY CREAM: Heavy cream makes the dip richer but can turn oily and separate when reheated. Whole milk keeps it smooth and reheatable without curdling—plus, it’s cheaper and easier to find. Trust me, the difference isn’t worth the hassle.
- ADD CAYENNE LAST: Sprinkle that cayenne pepper in after the dip is off the heat, or you’ll end up with a bitter, burnt edge. A pinch at the end keeps the heat bright and even. (Pro move: Taste as you go—adjust while it’s warm, not cold.)
Essential equipment for this dish
Heatproof Saucepan
Start with a medium saucepan that has sloped sides—I love my Calphalon stainless steel because it distributes heat evenly and prevents scorching. The sloped design helps the cheese melt smoothly without spilling over, especially when it starts bubbling.
If you don’t have stainless steel, a heavy-bottomed ceramic or enamel pan works just as well. Avoid thin aluminum pans—they heat too quickly and can cause the cheese to separate. 🔥
Wooden Spoon
A wooden spoon is non-negotiable for stirring this dip. Metal spoons can scratch the bottom of the pan and react with the cheese, creating a metallic taste. I use a long-handled silicone spatula as a backup to scrape up any cheese stuck to the sides.
The wooden spoon also helps break down any clumps gently, ensuring a silky-smooth texture. Pro tip: Soak it in warm, soapy water right after use to remove any cheese residue.
Serving Bowl
For serving, choose a deep, heatproof bowl—I prefer stoneware or cast iron because they retain heat beautifully. A glass baking dish (like Pyrex) is another great option, especially if you plan to keep the dip warm in the oven.
Avoid plastic bowls, as they can’t handle the heat and may warp. If you’re feeling fancy, a cast-iron skillet adds that classic pub vibe and keeps the dip bubbly for hours. 🍽️
Optional Slow Cooker
For parties or large gatherings, a slow cooker is a game-changer. Set it to warm and pour the melted cheese dip into it. The slow cooker keeps the dip creamy and warm for up to 4 hours, making it perfect for buffet-style serving.
Just stir occasionally to prevent a skin from forming. I use my Hamilton Beach programmable slow cooker because it’s affordable and reliable. 💫
Garnish Tools
For toppings, keep it simple: a sharp knife for slicing green onions, a paper towel to pat dry jalapeños, and a small spoon for sprinkling bacon bits. If you’re using pickled jalapeños, a fine-mesh strainer helps drain excess liquid quickly.
For extra flair, a microplane can zest a little orange peel over the top—it adds a bright, citrusy note that cuts through the richness. 🧅
Nutrition facts
Frequently asked questions
Can I make this cheese dip in the microwave instead of on the stovetop?
Yes, but with caution! Use a microwave-safe bowl and heat in 30-second intervals on medium-high power, stirring vigorously between each interval. The dip is ready when fully melted and bubbly (1-2 minutes total). Just be careful—microwaves can create hot spots that may cause separation or uneven texture. The stovetop method gives you more control for a smoother result.
What can I use if I don't have sharp cheddar?
No problem! Try pepper jack or white cheddar for a milder flavor, or swap in Colby Jack for a creamier texture. For extra tang, add 1 teaspoon of lemon juice to the melted cheese. The key is balancing flavors—if using a milder cheese, increase the cayenne slightly (0.5 teaspoon) to keep that signature kick.
How do I keep the dip warm for a party without drying it out?
Transfer the finished dip to a slow cooker on warm or place it in a 200°F oven in a heatproof bowl. Stir occasionally to prevent a skin from forming. For extra insurance, cover it loosely with foil. A cast-iron skillet on a very low burner also works well—just keep the heat minimal to avoid burning. This method keeps it creamy for up to 4 hours.
Can I make this dip ahead of time?
Prepare it up to 2 days in advance and store it in an airtight container in the fridge. When ready to serve, reheat in a saucepan over low heat, stirring until fully melted and smooth. Add a splash of milk if it thickens too much. The flavors actually improve overnight as the cheese melds together. Just avoid reheating in the microwave—it can make the dip grainy.
What's the best way to serve this dip besides tortilla chips?
This versatile dip pairs well with pretzel crisps, pita chips, fresh veggies (like bell peppers or celery), or even toasted baguette slices. For a heartier option, serve with soft pretzel bites or crackers. If you're feeling adventurous, try spreading it on tortilla wraps with grilled chicken for a cheesy quesadilla twist. The possibilities are endless!