
Main Courses
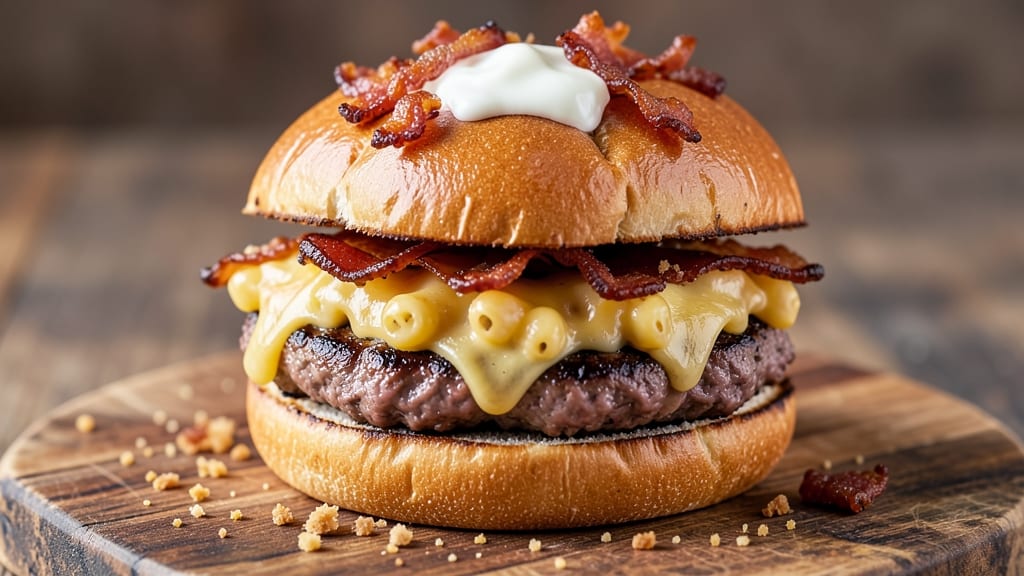
This bacon mac and cheese burger recipe transforms a classic comfort food into a showstopping meal that delivers crispy edges, melty cheese, and smoky bacon in every bite.
The secret lies in baking the mac and cheese into a golden crust while grilling the patty to perfection—two techniques that come together for a burger unlike any other.
I developed this recipe after years of experimenting with ways to elevate mac and cheese beyond the casserole dish, and the result is a handheld masterpiece that's equal parts indulgent and satisfying.
The beauty of this dish is in its balance: a crispy, cheesy exterior that holds up to the juicy burger patty inside, all wrapped in smoky bacon for that extra layer of flavor.
You'll start by cooking thick-cut bacon until it's perfectly crisp, then use those rendered fats to build a rich, velvety cheese sauce that coats every strand of elbow macaroni.
The sauce isn't just creamy—it's developed through a proper roux technique that ensures it stays luscious even after baking, creating that signature crispy crust we all crave.
What you end up with is a burger that's crispy on the outside, gooey on the inside, and packed with layers of flavor—smoky from the bacon, rich from the cheese sauce, and savory from the perfectly seasoned patty.
The mac and cheese component bakes into a golden, almost breadcrumb-like crust that contrasts beautifully with the tender, melty cheese underneath. This isn't just a burger; it's a full meal experience that combines two beloved comfort foods into something entirely new and irresistible.
The best part? Every component can be prepped ahead of time, so you're not stuck in the kitchen when guests arrive. The mac and cheese can be assembled in advance and baked just before serving, while the patties and bacon can be cooked separately and kept warm.
Garnish with fresh green onions or extra crispy bacon bits for a pop of color and flavor. Let's get started on creating this ultimate comfort food fusion.
Ingredients for bacon mac and cheese burger
Crispy bacon, melty cheese, and juicy beef—these ingredients fuse comfort food magic into one showstopper burger.
| Ingredient | Amount | Notes |
|---|---|---|
| Thick-Cut Bacon 🥓 | 8 oz | Crispy cooked, chopped for garnish |
| Ground Beef 🥩 | 1 lb | 80/20 fat ratio preferred |
| Elbow Macaroni 🍝 | 12 oz | Dry weight, cooked al dente |
| Sharp Cheddar Cheese 🧀 | 8 oz | Shredded, block preferred |
| Monterey Jack Cheese 🧀 | 8 oz | Shredded, block preferred |
| Heavy Cream 🥛 | ½ cup | Full-fat for richness |
| Unsalted Butter 🧈 | 4 tbsp | Cold for roux |
| All-Purpose Flour 🌾 | 2 tbsp | For roux |
| Garlic Cloves 🧄 | 2 cloves | Minced for flavor |
| Yellow Onion 🧅 | ½ whole | Diced, for roux |
| Salt 🧂 | 1 ½ tsp | Kosher preferred |
| Black Pepper 🌶️ | ½ tsp | Freshly ground |
| Worcestershire Sauce 🍯 | 1 tbsp | For burger seasoning |
| Fresh Green Onions 🌱 | 2 whole | Sliced, for garnish |
| Burger Buns 🍞 | 4 whole | Toasted for serving |
The bacon is non-negotiable here—thick-cut is a must for that perfect crunch. Oscar Mayer or Applewood smoked from the deli counter are my go-tos, but any quality brand works. Cook it until it's golden and crispy, then chop it for garnish—those bits add smoky depth to every bite. For the beef, 80/20 fat ratio keeps it juicy, and I always buy it pre-ground from the grocery store's butcher section. The macaroni? De Cecco or Barilla are my picks—they cook perfectly al dente. And the cheese? Block shredded is a game-changer (pre-shredded gets gummy).
No thick-cut bacon? Regular bacon cooked extra crispy works in a pinch. For the beef, ground turkey or chicken can replace it if you want a lighter option, but the fat is key for juiciness. Running short on sharp cheddar? Pepper jack or gouda add nice variations. The Worcestershire sauce in the patty mix can be swapped for soy sauce or extra beef broth if you're avoiding it. For the mac and cheese, penne or cavatappi can replace elbow macaroni—just adjust the baking time slightly. Fresh green onions are ideal, but dried chives at half the amount work too.
The mac and cheese sauce can be made a day ahead and reheated gently—it actually tastes better the next day as the flavors meld. Store it in an airtight container in the fridge for up to 3 days. The cooked bacon keeps well in the fridge for 1 week if wrapped tightly, and the patties can be shaped and refrigerated for 2 days before grilling. For a crowd, double the recipe and bake the mac and cheese in a 9x13-inch pan—it reheats beautifully in the oven at 350°F for 15 minutes.
Why You'll Love This Recipe
- One-Pan Magic: I swear by this for lazy Sundays—just brown the beef and bacon in the same skillet, toss in the pasta, and let the cheeses melt together. No dirty dishes, no stress.
- Crispy-Creamy Obsession: That smoky bacon crunch against the gooey cheddar-Jack combo? It’s like a hug for your taste buds. Honestly, the first bite makes me close my eyes.
- Tailgate to Tuesday: Serve it as sliders for game day or a full burger for a weeknight—same recipe, different vibes. Even my picky teen devours it (and asks for seconds).
- Budget Boost: Ground beef and elbow mac are cheap staples, but the bacon and cheeses make it feel fancy. Leftovers? Even better cold the next day—no one complains.
Step-by-step instructions for bacon mac and cheese burger
Here's how to build the perfect fusion burger with crispy bacon, creamy mac and cheese filling, and juicy beef.
Cook and Prepare the Bacon
Start by cooking the 8 oz thick-cut bacon in a skillet over medium heat until crispy, about 12-15 minutes. Flip occasionally and drain on paper towels. Once cooled slightly, chop the bacon into small pieces - you'll use these for both flavor and garnish. The smoky aroma alone will make your kitchen smell amazing, but don't skip the crisping step - that's what gives these burgers their signature crunch.
While the bacon cooks, season the 1 lb ground beef with 1.5 tsp salt, 0.5 tsp black pepper, and 1 tbsp Worcestershire sauce. Mix gently with your hands just until combined - overworking the meat makes burgers tough. Form into four equal patties, about ¾-inch thick, and let them rest at room temperature for 10 minutes before cooking. This resting time ensures even cooking and prevents shrinkage.
Create the Creamy Mac and Cheese Filling
In a large pot, bring 8 cups water to a boil and cook the 12 oz elbow macaroni until al dente, about 10-12 minutes. Drain and set aside. Meanwhile, melt 4 tbsp unsalted butter in a saucepan over medium heat. Add the 0.5 whole yellow onion and 2 cloves minced garlic, cooking until softened, about 3-4 minutes. Stir in 2 tbsp all-purpose flour and cook for 1 minute to create a roux.
Slowly whisk in the 0.5 cup heavy cream and bring to a gentle simmer. Add the 8 oz shredded sharp cheddar cheese and 8 oz shredded Monterey Jack cheese, stirring constantly until completely melted and smooth. The sauce should be thick enough to coat the back of a spoon. Fold in the cooked macaroni and the chopped bacon pieces, mixing gently to distribute everything evenly. Remove from heat and cover to keep warm.
Cook the Beef Patties
Heat a clean skillet over medium-high heat and cook the beef patties for 3-4 minutes per side for medium doneness. You'll want them to reach an internal temperature of 160°F - use a meat thermometer for accuracy. Press down gently on the patties during the first minute to prevent curling, which ensures even contact with the pan. The patties should be browned and slightly crispy on the outside while remaining juicy inside.
While the beef cooks, lightly toast the 4 whole burger buns in the same skillet for 30 seconds per side until golden. This adds a nice crunch that complements the creamy filling. Keep the cooked patties warm on a plate covered with foil while you assemble the burgers.
Assemble the Bacon Mac and Cheese Burgers
Spread a generous layer of the mac and cheese mixture onto the bottom half of each toasted bun. Place a cooked beef patty on top, then add another layer of mac and cheese. The filling should be thick enough to hold together when you pick up the burger, but not so much that it spills out. Top with the bun lid and secure with toothpicks if needed.
Garnish each burger with 2 whole sliced fresh green onions for a pop of color and freshness. Serve immediately while everything is hot - the contrast between the crispy bacon, creamy cheese, and juicy beef creates a perfect bite every time. These burgers are best enjoyed fresh out of the pan when the cheese is still melty and the patties are juicy.
Pro Tips For Making Bacon Mac And Cheese Burger
- CRISP THE BACON FIRST: Thick-cut bacon takes forever to crisp—don’t wait until the last minute. Cook it low and slow (325°F) until the edges curl, then finish under the broiler for 2-3 minutes. Cold, crisp bacon crumbles better when mixed into the beef and cheese later, and it won’t turn greasy when the burger hits the pan.
- SALT THE BEEF TWICE: Season the ground beef before cooking, but don’t stop there. After it’s browned, hit it with another pinch of salt—this time mixed with a splash of water to deglaze the pan. The second salt cut through the initial seasoning, and the deglaze adds depth that dry-rubbing alone can’t.
- STEAM THE MACARONI: Undercooked pasta turns mushy in the burger, overcooked pasta gets dry. Boil elbows just until al dente (1 minute less than package time), then drain and immediately shock in ice water for 30 seconds. The cold stop keeps them firm but absorbs cheese better when reheated in the burger.
- MIX CHEESES IN STAGES: Sharp cheddar melts fast and can make the burger greasy. Start with half the cheddar and all the Monterey Jack in the beef mixture—it melts smoothly. Fold in the remaining cheddar right before pressing the burger, so it gets gooey from the heat but doesn’t turn the patty into a cheese log.
Essential equipment for this recipe
Skillet Essentials
You'll need a 10-inch cast iron skillet for the bacon and patties—it's my go-to for even heat distribution. I use Lodge Pre-Seasoned Cast Iron because it develops a natural non-stick surface over time.
For the mac and cheese, a large, heavy-bottomed saucepan (like All-Clad Stainless Steel) prevents scorching when making the roux. 🔥
Don't skimp on the meat thermometer—I recommend Thermoworks Smoke for accuracy when checking the patty's internal temperature. A fine-mesh strainer (like OXO Good Grips) is perfect for draining the pasta without losing too much water. Keep these tools within arm's reach to streamline the process.
Baking Tools
For the mac and cheese component, a 9-inch oven-safe baking dish (like CorningWare) is ideal if you want to bake it separately for a crispy top. If assembling directly in the burger, a lightweight baking sheet works for toasting the buns.
Preheat your oven to 375°F if baking the mac and cheese ahead of time—this ensures it reheats perfectly.
Prep Station
Set up a cutting board (I love John Boos Acrylic) for chopping bacon, onions, and green onions. A sharp chef's knife (like Wüsthof Ikon) makes quick work of these tasks. For mixing the beef patties, use latex gloves—they keep your hands clean and prevent overhandling the meat.
A small mixing bowl (like Pyrex Glass) holds the seasoned beef while you shape the patties.
Assembly Tools
Use toothpicks to secure the burgers during transport or serving. A spatula (like OXO Good Grips) helps spread the mac and cheese evenly on the buns.
For garnishing, a small bowl keeps the sliced green onions organized. Keep these tools handy so you can assemble the burgers quickly while everything's hot.
Nutrition facts
Frequently asked questions
Can I make this bacon mac and cheese burger ahead of time?
The mac and cheese filling can be made 1 day ahead and stored in an airtight container in the fridge. Reheat it gently in a saucepan over low heat until warm, stirring occasionally to prevent scorching. The bacon and patties should be cooked fresh before assembling, but you can shape the patties and store them in the fridge for 2 days before cooking. Assemble the burgers just before serving to keep everything crispy and warm.
What's the best way to keep the mac and cheese from getting soggy?
To prevent a soggy texture, make sure your mac and cheese filling is fully cooled before assembling the burgers. Use a lightly toasted bun and assemble the burger right before serving. If you need to hold them, keep them on a wire rack over a baking sheet in a 200°F oven for up to 15 minutes to maintain crispiness. Avoid placing the patty directly on the mac and cheese until the last moment.
Can I use ground turkey or chicken instead of beef?
Yes, but you'll need to adjust the cooking time and fat content. Ground turkey or chicken should be cooked to 165°F internally, which is 5°F higher than beef. To keep the patties juicy, add 1 tbsp olive oil to the meat mixture and avoid overworking it. The texture will be slightly leaner, but the flavor profile works well with the rich mac and cheese and smoky bacon.
How do I make this recipe vegetarian?
Swap the beef patty for a vegetarian burger patty (like Beyond Meat or Impossible Burger) and use vegetarian bacon (like coconut bacon or tempeh bacon). Keep the mac and cheese filling the same, but add 1 tbsp nutritional yeast to the sauce for a cheesy flavor boost. The texture and assembly process remain identical, just without the meat. The result is still hearty and satisfying!
Why did my mac and cheese filling get grainy?
Grainy mac and cheese usually happens when the cheese melts unevenly or the sauce is too thick. To fix it, whisk in 1-2 tbsp warm milk or cream to loosen the sauce, then stir over low heat until smooth. For prevention, use block shredded cheese (which melts better than pre-shredded) and remove the sauce from heat as soon as the cheese is fully melted. If the sauce is too thick, add a splash of liquid gradually while stirring constantly.