
Appetizers
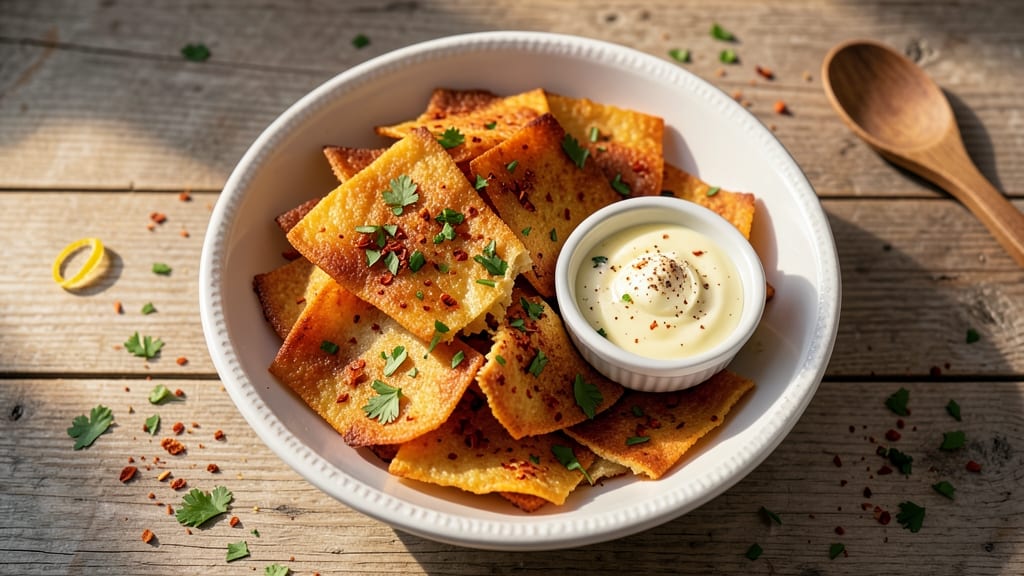
This Asiago cheese crisps recipe delivers golden, shatteringly crisp bites of melted cheese that vanish in seconds—perfect for parties, game day, or satisfying that salty craving. The secret lies in high heat and proper shaping, transforming ordinary cheese into addictive, restaurant-quality appetizers.
I’ve perfected this technique after testing countless variations, and the results are consistently crispy, flavorful, and foolproof.
With just 10 minutes of active time and 10 minutes in the oven, you’ll have a tray of crispy, cheesy triangles that bake up golden and shatter at the slightest touch. The key is using freshly grated Asiago cheese (pre-shredded won’t work!) and baking at 400°F for even crispiness.
Optional seasonings like garlic powder, chili flakes, or dried herbs add depth, but the classic version is already irresistible.
What you’ll end up with is a crunchy, cheesy masterpiece that’s impossible to resist—each bite delivers a perfect balance of salty, nutty Asiago flavor and satisfying crunch. These crisps stay crispy at room temperature for hours, making them ideal for snacking or serving at gatherings.
The best part? They’re easier to make than store-bought and taste infinitely better.
For extra flavor, try blending Asiago with a little Parmesan or smoked Gouda. Store leftovers in an airtight container for up to 5 days, or freeze for longer storage. Let’s get crispy!
Ingredients for asiago cheese crisps
Freshly grated Asiago cheese is the star—plus a few optional boosters for extra flavor.
| Ingredient | Amount | Notes |
|---|---|---|
| Asiago Cheese, freshly grated 🧀 | 8 oz | High-quality, freshly grated preferred |
| Parmesan Cheese, freshly grated 🧀 | 4 oz | For flavor depth, optional |
| Garlic Powder 🧄 | 1 tsp | For subtle depth, optional |
| Dried Chili Flakes 🌶️ | ½ tsp | For heat, optional |
| Dried Parsley Flakes 🌿 | ½ tsp | For color, optional |
| Unsalted Butter, melted 🧈 | 1 tbsp | For binding, optional |
| Diamond Crystal Kosher Salt 🧂 | ¼ tsp | For seasoning, optional |
| All-Purpose Flour 🌾 | 1 tbsp | For crispiness, optional |
The cheese makes or breaks these crisps—Asiago’s nutty depth is non-negotiable, and freshly grated is a must (pre-shredded won’t melt right). Grab a wedge from the deli counter—Whole Foods or specialty cheese shops carry the best. For extra richness, blend in Parmesan or smoked Gouda (I like a 3:1 ratio of Asiago to other cheeses). The high-fat content is what creates that golden, shatteringly crisp texture. If you’re feeling fancy, toss in a pinch of smoked paprika for a BBQ twist.
No Asiago? Parmesan or Gruyère work in a pinch, though the flavor won’t be as complex. Short on garlic powder? Fresh minced garlic (1/2 tsp) adds a punch—just toast it in the butter first. The butter and flour combo is optional but worth it for extra crispiness (think cheese fries, not just cheese). For a spicier kick, swap chili flakes for crushed red pepper flakes. And if you’re out of parsley flakes, dried oregano or thyme works just as well—just halve the amount.
These crisps stay crispy for hours at room temperature, so make a big batch for parties. Store leftovers in an airtight container with parchment between layers to keep them from getting soggy—lasts 5 days. For longer storage, freeze on a tray first, then transfer to a bag. Reheat at 350°F for 2-3 minutes to restore crispiness. Pro tip: Serve with chilled sparkling water or a bold red wine for the full experience.
Why You'll Love This Recipe
- No Grater Needed: I keep pre-grated Asiago and Parmesan in my pantry—just mix, spread, bake. No fuss, no mess, and honestly? The texture comes out better than when I try to grate it myself.
- Umami Bomb: That combo of nutty Asiago and sharp Parmesan? It’s like a cheesy hug for your taste buds. Add the garlic and chili, and suddenly you’ve got a crispy, savory punch that doesn’t need a single other ingredient to shine.
- Game for Any Meal: I’ve served these as a snack with beer, sprinkled them over pasta, and even tossed them into salads. They’re the kind of thing that turns a basic plate into something worth it—no extra effort required.
- Leftovers? More Like Never: Between us, these disappear fast. But if you somehow have extras, they stay crispy for days in an airtight container. (Yes, even on a Tuesday night when you’re craving something but don’t want to cook.)
Step-by-step instructions for Asiago cheese crisps
Here's how to transform simple pantry staples into irresistible, golden cheese crisps that melt in your mouth.
Combine Cheeses and Seasonings
In a medium bowl, mix together the 8 oz freshly grated Asiago cheese and 4 oz freshly grated Parmesan cheese using your fingers or a fork. This combination creates the perfect balance of nutty depth and sharp flavor that makes these crisps exceptional. The Asiago provides that signature crunchy texture while the Parmesan adds complexity.
Next, add the 1 tsp garlic powder, 0.5 tsp dried chili flakes, 0.5 tsp dried parsley flakes, and 0.25 tsp Diamond Crystal kosher salt. Work these seasonings into the cheese mixture until completely distributed. The garlic powder enhances the savory notes, while the chili flakes and parsley add subtle heat and color. Don't skip this step—even distribution ensures every crisp has balanced flavor.
Incorporate Binding Ingredients
Add the 1 tbsp melted unsalted butter to the cheese mixture and stir until fully combined. The butter acts as a binder, helping the crisps hold their shape during baking. If the mixture feels too wet, add the 1 tbsp all-purpose flour and mix until it just comes together. You're aiming for a texture that's slightly crumbly but holds when pressed—think damp sand rather than wet cement.
Here's the thing—if you overmix at this stage, you'll develop gluten and end up with tough crisps instead of delicate, shatterable ones. Just combine everything until no dry spots remain, then stop. The mixture should be cool enough to handle but still pliable. If it's too warm, let it sit at room temperature for 5 minutes before proceeding.
Shape the Cheese Crisps
Using your hands or a small cookie scoop, portion the cheese mixture into 12 equal-sized balls, each about 1 tablespoon in size. I like to use the scoop method for consistency—press the mixture firmly into the scoop, then gently tap it onto your prepared baking sheet. This ensures uniform baking and even crispiness.
Place the balls about 1 inch apart on a parchment-lined baking sheet. The spacing is crucial—it prevents the crisps from fusing together during baking. For extra crispiness, I press each ball gently with my thumb to create a slight indentation in the center. This creates more surface area for browning and adds to that satisfying crunch.
Bake to Perfect Crispiness
Preheat your oven to 375°F with the rack positioned in the middle position. This temperature is critical—too low and they'll be greasy, too high and they'll burn before crisping. Once preheated, bake the cheese crisps for 8-10 minutes, watching closely after the 6-minute mark.
You'll know they're done when the edges turn deep golden brown and the centers appear slightly puffed but still firm to the touch. The crisps should release easily from the parchment when gently lifted with a spatula. If any seem underdone, return them to the oven for 1-2 minutes until properly crisped. Resist the urge to overbake—they'll continue crisping as they cool.
Cool and Serve Immediately
Remove the crisps from the oven and transfer them to a wire rack set over a baking sheet. Let them cool for 3-5 minutes—this allows them to set completely and develop maximum crunch. The contrast between the crisp exterior and the creamy interior is what makes these irresistible.
Serve the crisps immediately while they're still warm and shatterable. They'll maintain their crispiness for about 20 minutes, but after that, they'll start to soften. For the best experience, arrange them on a platter and serve with a side of marinara sauce or your favorite dipping oil. These crisps are perfect for parties, game day, or as a sophisticated snack with cocktails.
Pro Tips For Making Asiago Cheese Crisps
- GRATE IT FINE: Freshly grated Asiago and Parmesan make all the difference—but if your grater’s teeth are too big, you’ll end up with lumpy crisps that don’t brown evenly. Use a box grater with the smallest holes (or pulse in a food processor), then sift out any stray chunks. Trust me, the texture of the crisps depends on this.
- SALT THE PAN FIRST: Skip the oil first, and you’ll waste time scrubbing a cheese-stuck skillet. Heat your pan dry, then add a pinch of salt before the oil—it’ll help the crisps crisp up faster and prevent sticking. (Yes, even if your cheese is already salty.)
- WATCH THE GOLDEN MOMENT: These crisps go from perfect to burnt in seconds. Start them on medium-high, but as soon as the edges curl and turn golden, move them to a plate—don’t wait for them to brown all over. Overcooking turns them rubbery, and nobody wants that.
- MIX THE SEASONINGS LAST: Garlic powder, chili flakes, and parsley lose their punch when toasted in oil alone. Toss them into the cheese right before shaping so they stay vibrant and flavorful. Pro move: Sprinkle a little extra parsley on top after baking for that fresh pop.
Perfect pairings for these flavors
Dip Pairings
Serve these crisps with warm marinara sauce—the classic combo is foolproof. I like Rao’s Homemade Marinara for its balanced acidity and sweetness. For something richer, try balsamic reduction drizzled over the crisps or paired on the side. The tangy-sweet contrast elevates the nutty Asiago flavor. 🍅
Cocktail Matching
A dry rosé like Whispering Angel complements the crispy texture and salty notes beautifully. The crisp acidity cuts through the richness, cleansing your palate between bites. For beer lovers, a Belgian witbier (like Hoegaarden) with its citrusy notes and effervescence works wonders. Avoid heavy stouts—they’ll overpower the delicate cheese.
Savory Sides
Pair with prosciutto-wrapped melon for a sweet-salty contrast that’s perfect for summer gatherings. The crispy crisps balance the juicy fruit and salty prosciutto beautifully. For a heartier option, serve alongside roasted cherry tomatoes tossed with basil and olive oil. The acidity in the tomatoes refreshes your palate after each bite.
Sweet Contrasts
Drizzle honey over the crisps before serving for a sweet-savory balance. I recommend local wildflower honey for its floral notes. Alternatively, serve with dark chocolate (70% or higher) for a sophisticated dessert-like experience. The bitterness of the chocolate contrasts perfectly with the salty, nutty cheese. 🍯
Global Variations
For a Mexican-inspired twist, serve with smoky chipotle crema and sliced avocado. The crema adds heat and creaminess, while the avocado provides freshness. In Italy, these crisps would be paired with olive oil and lemon zest—simple but effective.
For a spicy kick, offer sriracha mayo on the side. The heat levels up the nutty Asiago perfectly.
Nutrition facts
Frequently asked questions
Why does my Asiago cheese crisps recipe turn out greasy instead of crispy?
Greasy crisps usually happen from one of three issues: overmixing the cheese (which develops gluten), using pre-shredded cheese (it contains anti-caking agents), or baking at too low a temperature. Always use freshly grated cheese and bake at 375°F for 8-10 minutes—the high heat is key for that perfect crunch!
Can I make these crisps ahead of time?
They stay crispy at room temperature for 2-3 hours if stored in an airtight container with parchment between layers. For longer storage, freeze them on a tray first, then transfer to a bag. Reheat at 350°F for 2-3 minutes to restore crispiness. Pro tip: Make them the night before for easy party snacks!
What's the best cheese substitute if I don't have Asiago?
For a similar nutty flavor, try Parmesan or Gruyère—both work well in a 1:1 ratio. If you want something milder, sharp cheddar (aged 2 years) gives a great chewy texture. Just remember: freshly grated is non-negotiable for that perfect crisp!
How do I keep my crisps from sticking to the baking sheet?
Line your sheet with parchment paper and brush it lightly with olive oil before shaping the crisps. If you're worried about sticking, chill the shaped crisps in the fridge for 15 minutes before baking—they'll hold their shape better and release easily. Never skip the parchment!
Can I add fresh herbs to these crisps?
Fresh herbs like basil or parsley won't survive the baking process—they'll wilt and turn mushy. Stick to dried herbs (like parsley flakes) or sprinkle fresh ones after baking for garnish. For extra flavor, try adding 1/2 tsp smoked paprika to the cheese mix before baking.